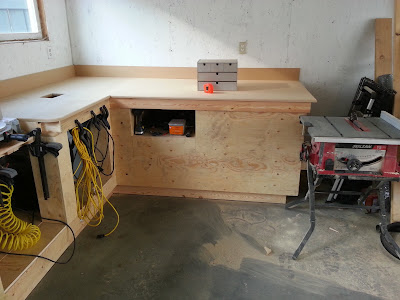
The weekend started out with a trip to Lowes to pick up my new table saw.
I started with a saw, a load of 2x4s and a big empty corner in my garage.
 |
| The dogs wanted to help! |
Here we go, base of the first leg.
Working my way up. The 1x4s are the base for the lumber storage area.
Base of the second leg.
 |
| Coffee and early Sunday morning construction |
Sub structure for the tops of both side started.
The miter saw is on a lowered shelf to be flush with the table top
Tops in place. 3/4" MDF is not the most fun material to work with
but it's sturdy and provides a nice smooth work surface
Built a cubby for storing hand held power tools.
Also added a back splash to the top
Perfect fit!
Front facing. It's just raw 1/2 ply for now, looking for something to face it with.
Behind it is all open for spare lumber storage, you can see some extra 2x4s poking out.
Built out around the legs for a cleaner look, this is also just the ply
and will be faced with something once I find a suitable material.
Cubby, faced, trimmed and already in use
The cords are just temporary, but behind them is the garbage bin and shop vac
Miter saw, flush with work surface and compressor below
This small 2x4ish hole behind the miter saw has a hose that I can connect to my shop vac.
Since the miter saw is the lowest part of the space I can just sweep it all into there.
You can see more of the details in this shot.
Rounded edges leading to the miter saw,
routered edges throughout,
the hole in the table drops right into the garbage
This side is about40" deep
This side is about 36" deep
So that's it so far. Still stuff to do, but I got it to a good place before the end of the weekend.
Special thanks to Darren and Nate for helping out, and to Lori and Shelley for design input.
To do;
-Find something to cover the plywood
-Drawers are going on the left side
-Shelving to go up
-Peg board to go up
-Free standing, rolling table for the table saw


No comments:
Post a Comment